In this post I demonstrate how easy it is to design user interfaces with PyQt5 Designer. We’ll design a simple UI, which allows to add two numbers. Because I often have to develop scientific applications in my job, I regularly face the challenge of developing simple GUIs. There are hundreds of solutions, web- or fat-client based ones, which one could choose from. However, when it comes to developing new UI prototypes as quickly as possible, there’s no getting around a designer app. In the post I’ll use the tools on a windows based computer with linux-like shell like ‘gitbash’ or ‘cygwin’; but you can easily adapt the procedure for linux or other operating systems.
What do you need?
The only thing you need ist a running installation of python and some skills with using the shell. You can get it here. All other packages or tools we will install in the course of the explanations described here.
Preparations
First, create a project folder, where you want to develop your application in. Change to the directory:
$ mkdir pyqt5demo
Now we’ll create a virtual environment in this folder. This is the way to handle dependencies in python and separate project-specific configurations and installation from pc-global installations. The virtual environment configuration is placed in a folder named ‘env’ by convention. Of course you can change that, if you please:
$ python -m venv envAfter execution of this command, you’ll find the new folder within your project folder. For the package installations to affect the virtual rather than the global environment, we’ve still got to activate it:
$ source env/Scripts/activate
(env)
Typing ‘$ deactivate’ would again deactivate the virtual environment. For the moment, we’ll leave it activated. The environment’s name in brackets ‘(env)’ in front of your shell-prompt indicates, that the virtual environment is currently activated.
Now let’s install PyQt5 libraries, the PyQt5Designer and the pyuic5 tool. The latter is needed to convert the *.ui designer files into python scripts. Please make sure to have a running internet connection, since web access is necessary to install new packages from the web:
$ pip install PyQt5
$ pip install PyQt5Designer
$ pip install pyuic5-tool
Congrats! You’re done! Now you’ve got all the software you need in order to start designing GUIs!
Design a UI using PyQt5 Designer
Start the designer application by issuing the following command in your shell:
$ designerYou can also write ‘designer.exe’ on Windows based systems. On Linux – like systems you would drop the ‘.exe’ extension. You’ll then be prompted with the following startup screen:
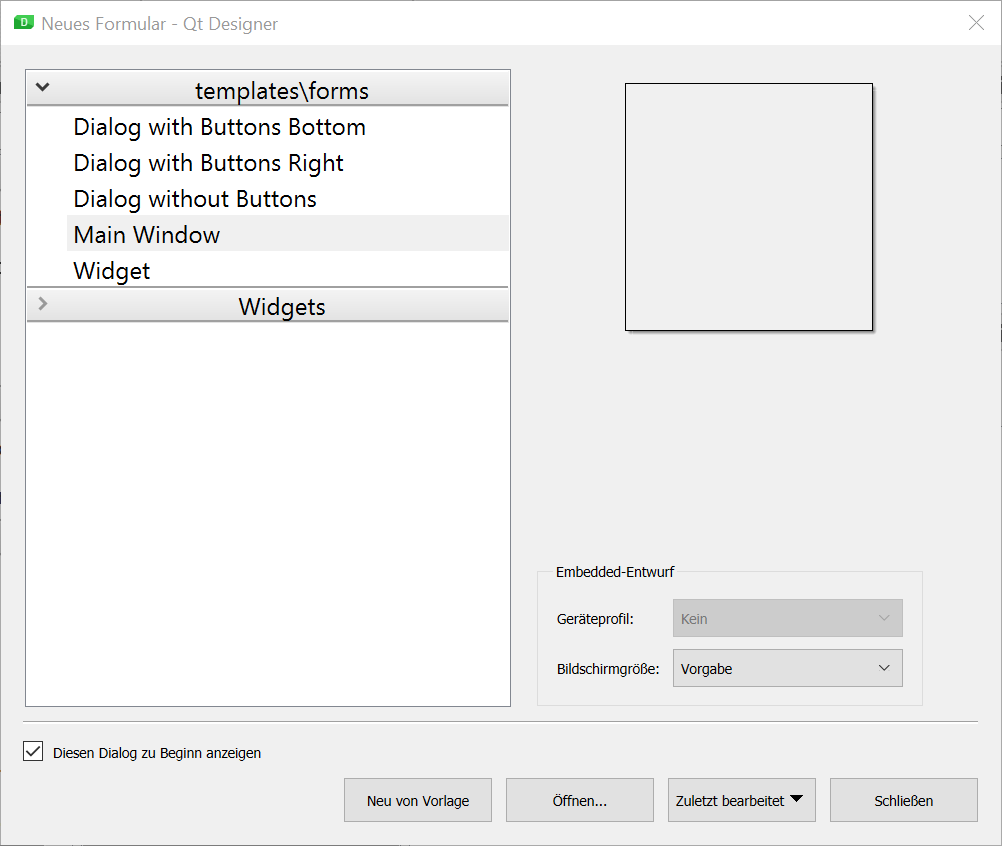
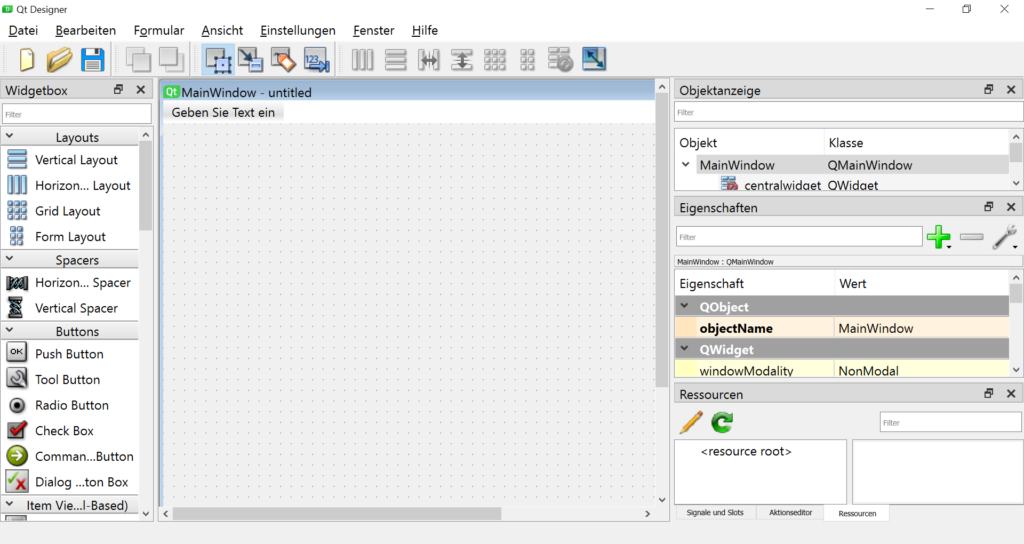
Choose ‘Main Window’ and ‘Neu von Vorlage’ (or probably ‘New from Template’ in english) to start designing a Main Window application. You’ll then get presented the Designer Application with an empty canvas. On the left side you see lots of UI components, such as buttons, text fields, and the like. The properties of the selected objects are displayed on the right side.
Drag and drop some QLabels, QLineEdits and a QPushButton onto the canvas to make it look as follows:
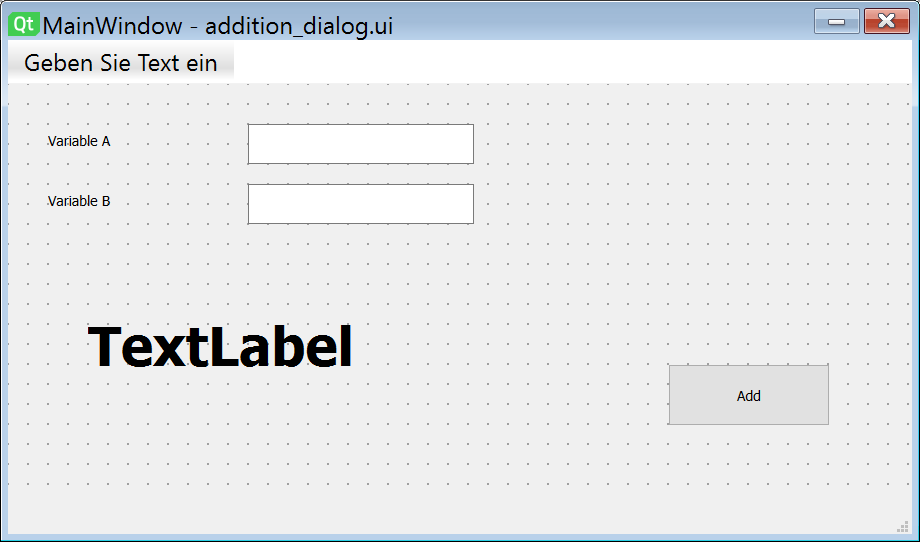
Now choose “Datei / Speichern” (or ‘File / Save’) from the menue and store the file in your project home folder with the name ‘addition_dialog.ui’. The file written will contain an xml-based description of the UI you just designed.
In the next step, we convert the *.ui – file to a python qt5 sourcecode file. This is done as follows:
$ pyuic5 -x addition_dialog.ui -o addition_dialog.pyAfter having issued this command, the file ‘addition_dialog.py’ will be auto-generated and written to your current folder. It is already a valid and working python application, which opens the main window as designed in the designer before. However, there is no functionality available yet, since we haven’t enriched it with any logic. You can start the application issueing:
$ python addition_dialog.uiNow you should you new application:
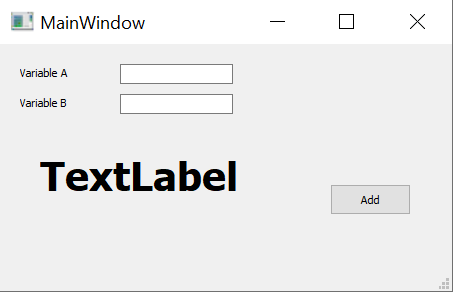
Congrats! You’ve just successfully created your first PqQt5 based UI application! On the web there are tons of good tutorials explaining how to generate GUIs using the designer, like this one.
Add Some Logic
Of course, we want to add some minimal logic to our example. Since this project is part of a larger series of tutorials, we want to write logic, which allows us to add two given integer numbers.
We take the simplest approach and refrain from defining input masks and code for input validation. So we will limit ourselves here to the minimum necessary basics only.
Looking at the source file, you will identify the following different code sections:
- Ui_MainWindow Class
- setupUi method: define and construct the UI using PyQt Widgets
- retranslateUi method: define language dependent texts
- if __name__ == “__main__” clause: main program to launch the application, instantiating and deconstructing the UI
Now let’s go for the changes: In the setupUi method we want to add an event handler trigging some logic if the button gets pressed. This happens in the following line of code:
self.pushButton = QtWidgets.QPushButton(self.centralwidget)First, replace the line above with the following:
        self.pushButton = QtWidgets.QPushButton(self.centralwidget,
                          clicked = lambda : self.press_it(svc))
This causes the press_it method to be invoked when the button is clicked. Of course, for that to work, we need to implement the logic for the press_it method. For this, go to the end of the class source, and right after the definition of the retranslateUi method add the follwoing source:
    def press_it(self, svc):
        a = int(self.varATextBox.text())
        b = int(self.varBTextBox.text())
        c = a + b
        self.resultLbl.setText("Result: " + str(c))
That’s it. If you now run the application again, provide two integer numbers and hit the ‘Add’-button, it should add the two numbers provided in the input fields and print the result. Here you find the complete sourcecode of the ui as well as the ui descrition file.
Congratulation! You’ve just fininshed your first very basic PyQt UI application.